Wrenly's Christmas project Mitered Flange Pillows....

Friday was such a productive day for me.....getting a dress made for a photo shoot, quilting on a quilt, doing a post for Wrenly's Christmas.....going to a office party with my husband. Then I woke up in the middle of the night and realized that I didn't publish my Wrenly's Christmas......so here is Friday's post on Saturday.....


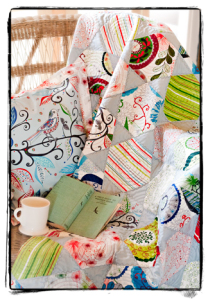
Sometimes all we need is a little redecorating to put us in the mood for the holidays. I have decided that changing the pillows is a perfect way to change a room.

_blogsophiaxmascat2
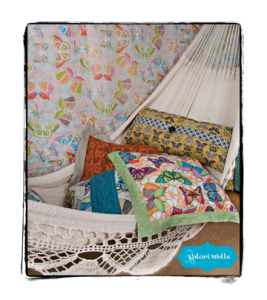
I love the flange, mitered pillow because you can play with different fabrics. Doesn't Wrenly look like the perfect little birdy waiting for Christmas.....

I have a really simple pattern for the pillows that I thought I would share. Get a jump start on holiday decorating.

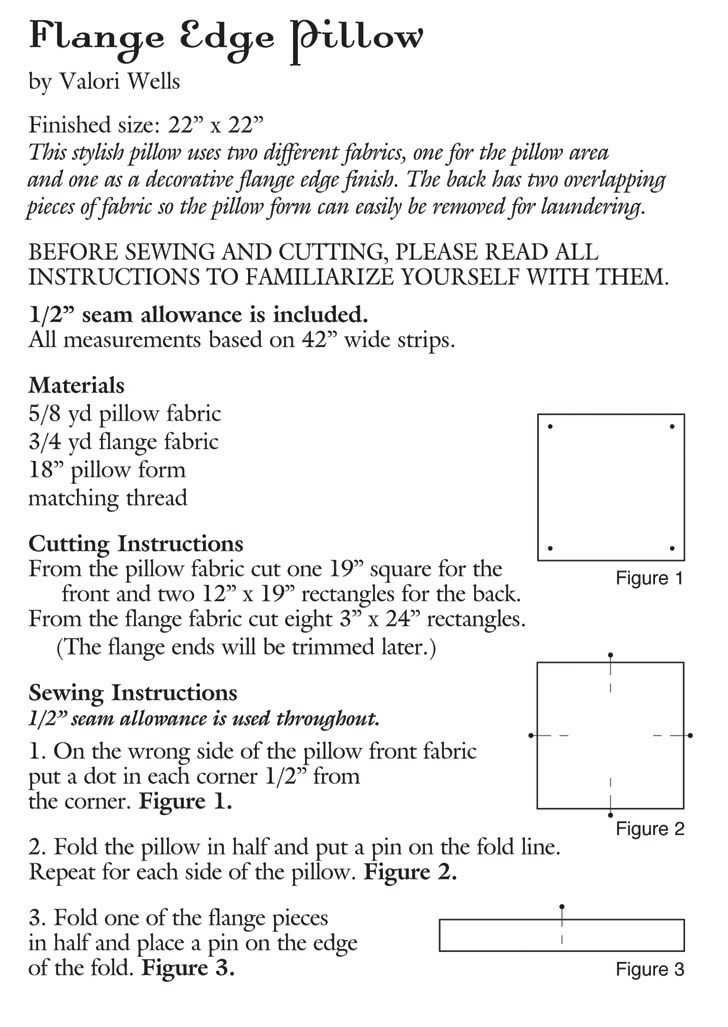
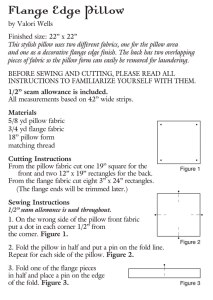
Flange-Edge-Pillow
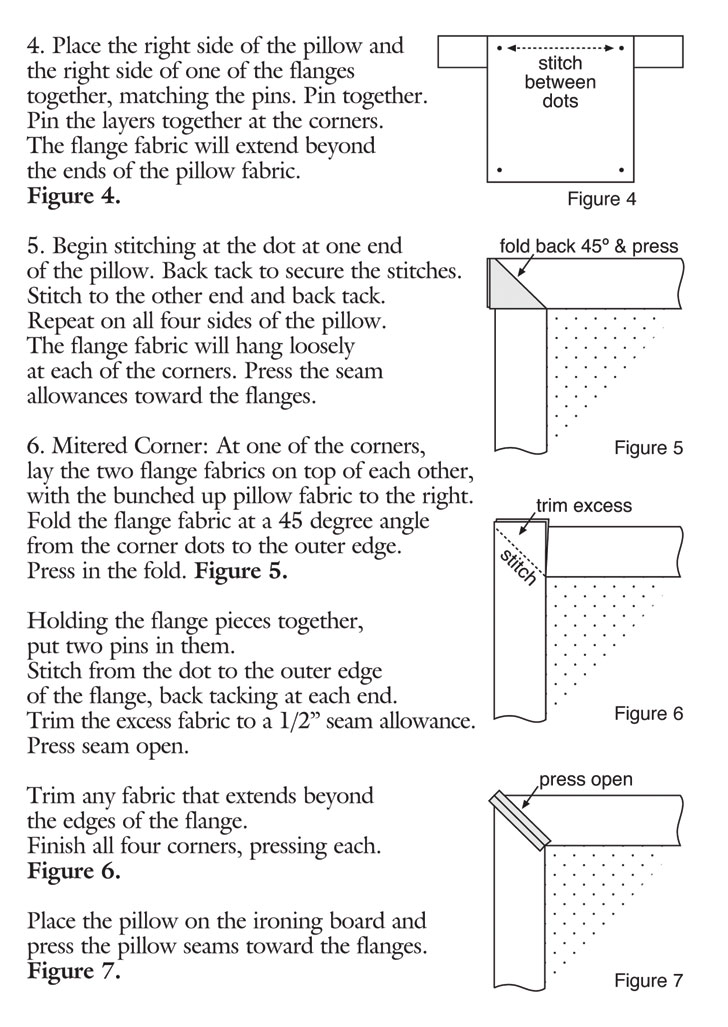
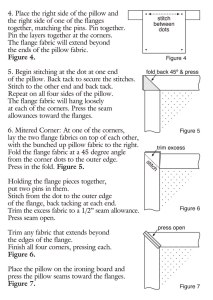
Flange-Edge-Pillow2
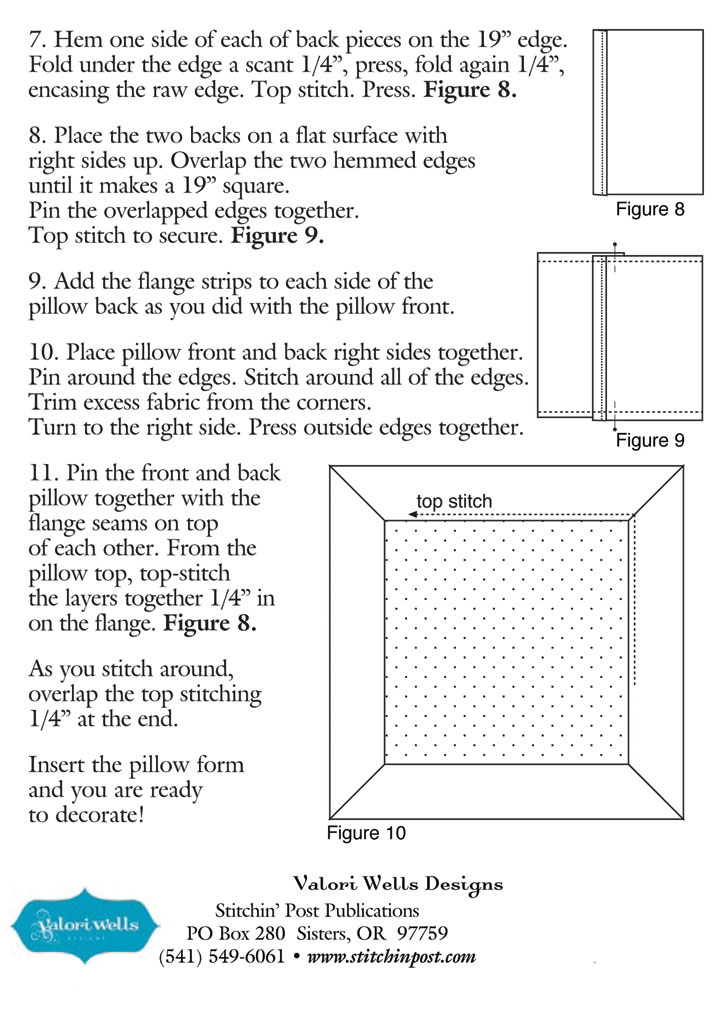
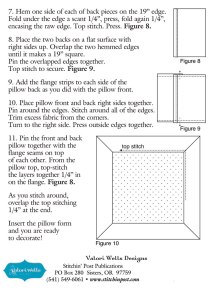
Flange-Edge-Pillow3
I hope you have a great weekend.....We have been dealing with a nasty fire around here. The smoke is horrible in the morning but tends to lift by the afternoon. At this point our shop is still on alert to evacuate if the fire gets much closer to town but the AMAZING fire crews up there are keeping it at bay. Unfortunatley this fire will be a problem until we get some really heavy rain or our first big snow storm. There is so much fuel inside the fire line that will just gradually burn. Our beautiful forrest! So sad....

Have a great day!
XOXO

Valori

Simply Made Summer....the end of July!

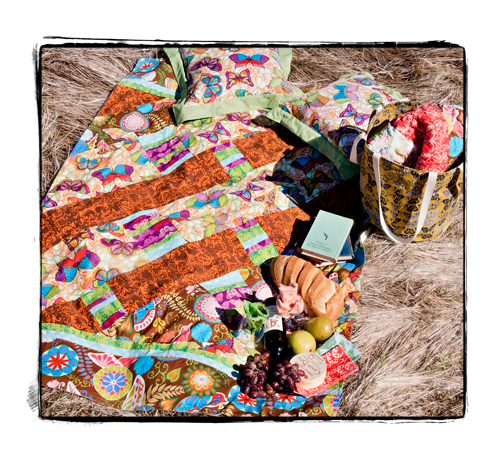
Good Morning.....we are getting ready to head out for a little family vacation but I had to share a fun pattern for the perfect picnic.

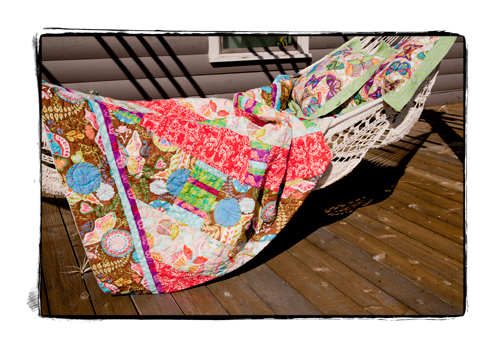
Skye....I made this quilt out of voile, cotton and then I made it into a picnic blanket.

Picniccloth
Picnicgirls
Skye
I love it out of the voile...it is so soft yet cool.....perfect for a summer evening.

Here is the pattern for you to download and share.....

Download Skye_web

Hope you have a great weekend!!!!

We are hitting the road!

XO

Valori

Simply Made Summer.....

Happy Friday!!!! I have to apologize about last Friday and Simply Made Summer....it was a big day for Quilter's Affair. Of course I had the best intentions and I figured I could do it all and still get in a post. I came to the realization at 9 p.m. as I was working at the shop that I was just not going to get it in.

Tomorrow is my Princess Violette's 5th Birthday....she is very excited for her Bubble Gum Princess party. In our house you don't get gum until you are 5....hence the bubble gum part! We love parties......and the summer is full of them!

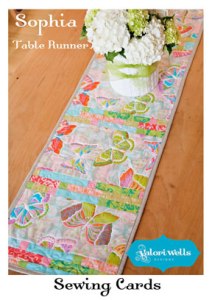
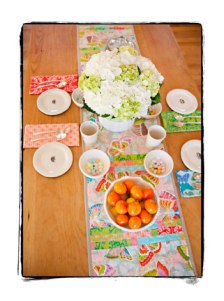
This week for Simply Made Summer I thought I would introduce you to the Sophia Table Runner....she would look great on a table for a party....

Sophia-tableruner.blog

This is a perfect project for a beginner because it has simple piecing, color play with the large scale print and piecing, quilting and binding.Those skilled quilters will find it a fun quick project to add a little style to your table.

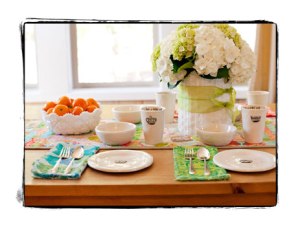
Tablesetting
Tablesetting2.blog
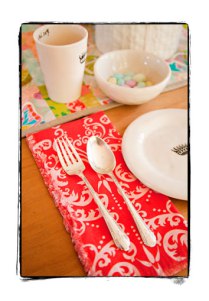
To top off a great setting you need napkins......I have perfect napkin pattern for you.

Cocoonnapkin
All you need is a fat quarter - 18" x 18" piece of fabric, squared up. Then all you do is pull the strings until you get an fringe edge.

Napkinstrings
Once you have pulled the strings and you have 1/4" to 1/2" around the entire piece you clean up the edges and your done. There is no sewing required. This is a great gift for the hostess. It is fun to do lots of different patterns in a pack that you give away. It is a bit time consuming but a good tv project or weekend by the pool.....

Hope you have a great weekend!

XO

Valori


July's first Simply Made Summer....

Hello.....FRIDAY!!! The last relaxing day until Quilt Show is over. Sunday starts the whole event off with the Fiber Arts Stroll, Monday is the beginning of Quilter's Affair Classes at the high school....and the week goes on....I am really excited for Quilter's Affair and Quilt Show this year. I think it is going to be a great year!

Photo copy 5
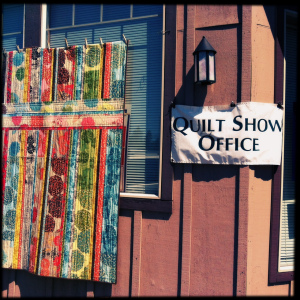
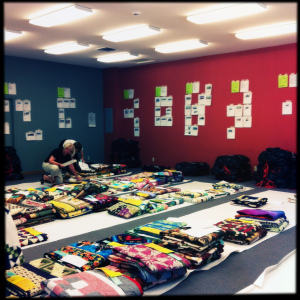
The Quilt Show office is now open and sorting quilts.....

Photo copy 4

They are so organized....it is truly amazing that 1500ish quilts come into this space get organized and then One Summer Day in July....Sisters, Oregon is transformed with quilts hanging all over town! It is beautiful!

We are having a bbq tonight to start off the party......

But before I get to my cooking and mixing of sangria I will share my Simply Made Summer for today.....

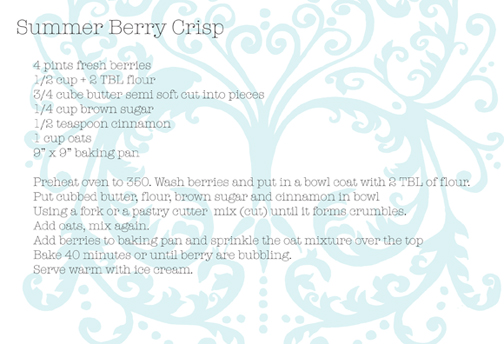
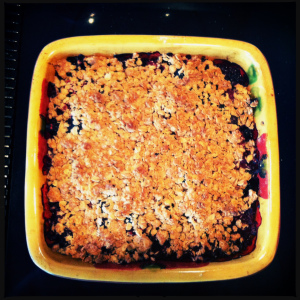
It is BERRY season around here and Oregon does have the most amazing berries. That being said I have to share my Summer Berry Crisp recipe. It is the perfect last minute dessert....takes no time at all and is truly yummy.

SummerBerryCrisp
Download SummerBerryCrisp and the download for your recipe box....(I Hope)

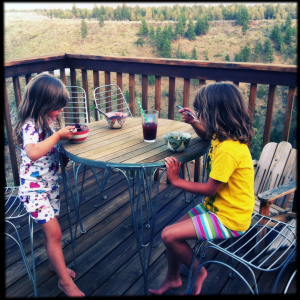
Olivia and I made this crisp last night....unfortunately we didn't have any ice cream so in turn we put chocolate chips on it. When the crisp is warm it is so yummy with the chocolate. Fun new addition to the recipe.

Photo copy 2

Photo copy 3

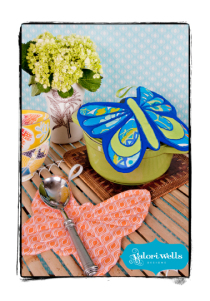
Now when you make this lovely crisp you will need a pot holder to get it out of the oven....In case you are tired of your old pot holders I have a pattern for you....

Potholders.blog
My Flutterby Pot Holder Sewing Card......super cute and easy......can't go wrong with that!

Now I am off to prepare for a BBQ.

Have a great weekend!

XO
Valori

Simply Made Summer.......

Happy Friday! As summer continues I am hoping for warmer weather for my garden....luckily we have missed the frost but there is not much new growth.....Looking forward to July when we have warmer days.....

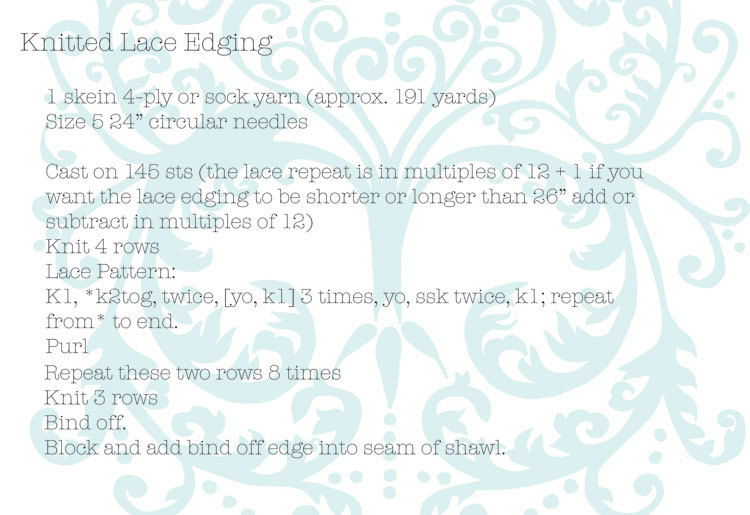
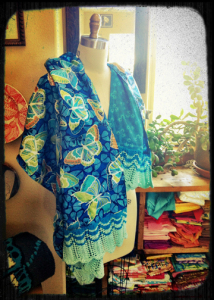
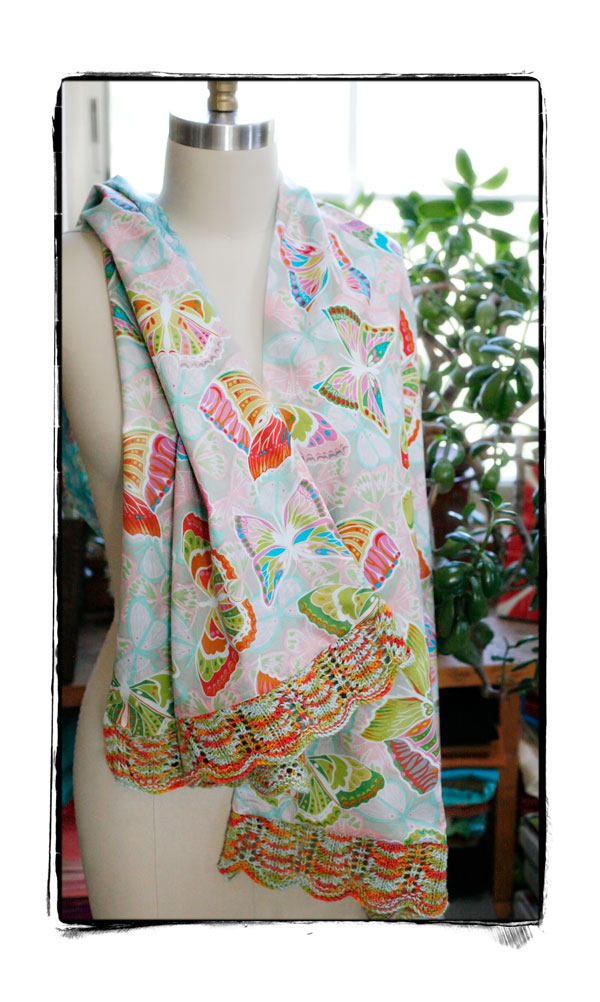
I have been working on the instructions for the knitted edging for the Summer Nights Shawl and am happy to say they are done and ready for you......

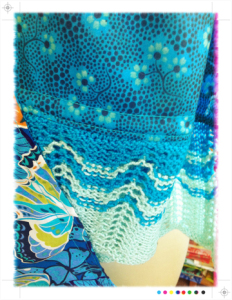
Knittedlaceedging
here is the download able version Download Knittedlaceedging

Knittedshawl2
This was my test version....on this I used two colors and make it longer. The pattern is for the original shorter version.

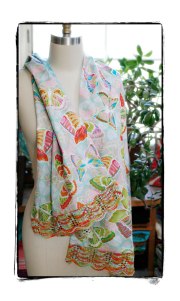
Knittedscarf
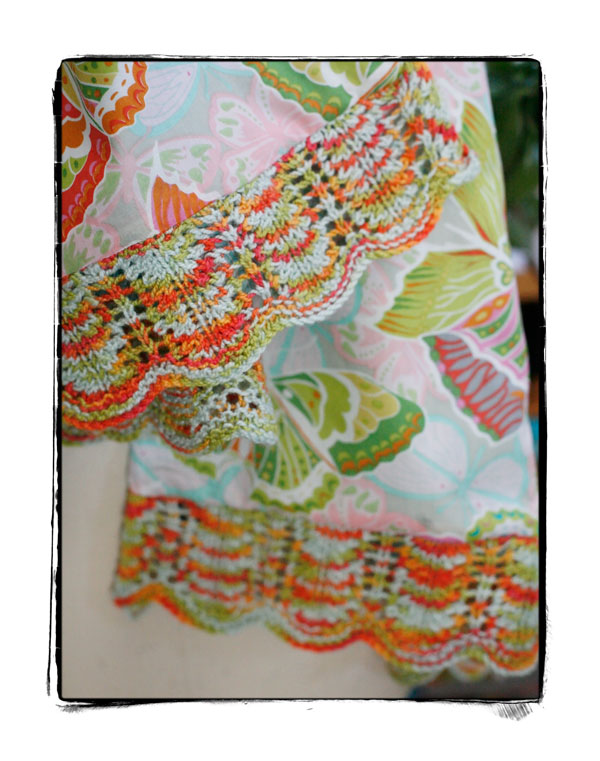
I used Shibui variegated sock yarn......as my obsessive personality continues I am now knitting the edging out of 4 ply yarn for my voile Fina skirt. To adjust the pattern so that the lace is long enough I measured the bottom edge of my skirt and added stitches in multiples of 12 to make it the appropriate length. I will share when it is done!

Knittedshawl3

Knittedshawl1

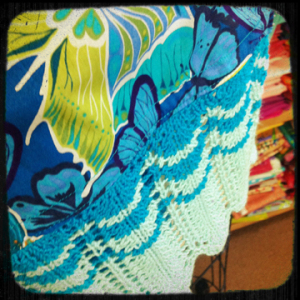
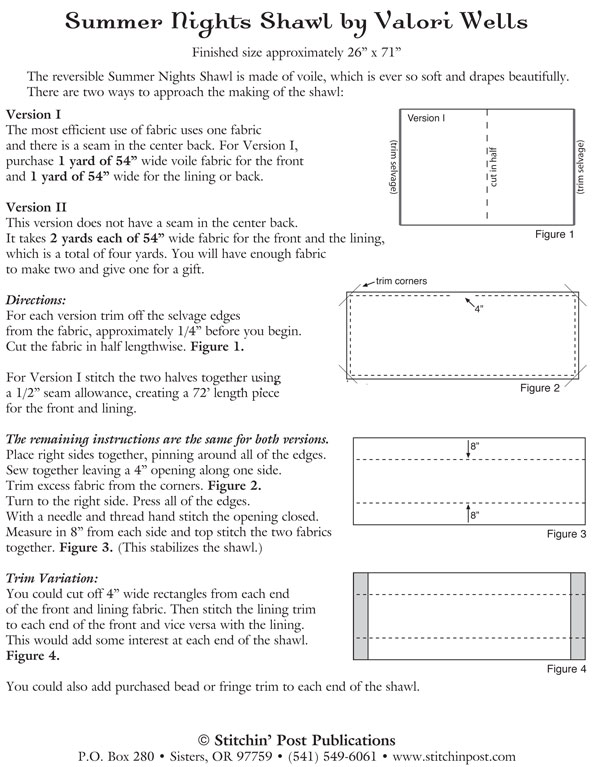
This is the back side or other side of the knitted lace edging.....I think it is just as beautiful as the front. Just in case you didn't get the Summer Night Shawl pattern here you go.....

SummerNightsShawl-web


and if you want to share..... Download SummerNightsShawl-web

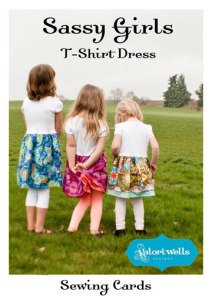
Another great weekend project the Sassy T-Shirt Dress for your favorite little girl. My girls love their dresses and love it when I make them something out of my fabric. I am not sure at what age this ceases to be fun but for now they love it.

Sassytshirt.blog

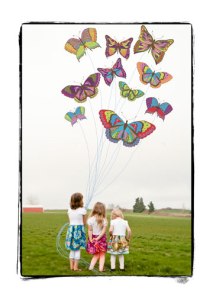
For market I took a picture of the girls in the field and added butterfly kites to the sky. This was blown up to a 4' x 8' panel and became one of the walls of the booth. I just love it!

Girls.blog
So easy to make.....all you need is a t-shirt and some voile or cotton and about an hour....

Have a great weekend!!!

XO

Valori

Simply Made Summer......#3

Happy Friday!!! Another beautiful day in Sisters....I think Summer is finally here! Summer makes my weekends perfect....not stuck in the house when it is raining and cold. UUUGGGHHH!!! Summer keeps us outside...in the garden, on the deck just enjoying our lives!

But before we embrace the weekend how about a simple project to add color and style to your summer....Flange Edge Pillows. The pillows are only outside when I am or we are having company. I remake my covers once a year since having them outside fades the fabric..... I also change my fabric frequently since I have new designs out every six months.These are made out of Cocoon Cotton Linen...yummy to work with...

CocoonPillows2

Flange-Edge-Pillow

Flange-Edge-Pillow2

Flange-Edge-Pillow3
And now for the down loadable version.....there are two different pages. It is designed so that you can print one page out flip it over and print out the other page, trim if needed and fold in half for a card! Fun to give away with some fabric and a pillow form as a gift.

Download 5x7_FlangePillow-web-1

Download 5x7_FlangePillow-web-2

Now an update on the Summer Night Shawl with the knitted lace edge.....I had a lot of sitting around time last weekend when we worked the Rodeo Dance.....and I am excited to say the scarf is done! Made with Cocoon Voile...yummy! I am testing my knitting instructions on another shawl and then I will share the knitted lace edge pattern.

Knittedscarf
Knittedscarf2
My only added touch will be to topstitch in around the edges about 3/4" in from the seam.

I think it will be nice....Next will be a wrap dress to go with the scarf that I can wear to a wedding in a couple of weeks....

Have a great weekend!

XO

Valori


Simply Made Summer.....June 8....

Happy Friday!!! Always a great day to start a new project.....I have a perfect simple project for you. A summer shawl made out of voile.....so soft and light and stylish.

Boltsvoile

Yummy Cocoon Voile....all you need is a yard of two different pieces.....

CocoonShawl

And you can make a beautiful shawl....

SummerNightsShawl-web

You can download this easy Download SummerNightsShawl-web and share with your shop or your friends!!!!

Missondycocoon
I love my shawl and I have decided to make it even better....I am knitting a lace edging that will go on the short edges of the shawl. Once it is done I will pass on a photo....One of my goals is to create patterns that incorporate fabric and knitting....

Have a great weekend!!!

XO

Valori

Simply Made.....

Hello my friends.....it is the next instalment of Simply Made.

I love to make receiving blankets for babies out of flannel but in the summer you need something cooler. Cotton Voile...the perfect solution to a cozy and cool receiving blanket for the summer.

Summer Baby Blanket

Materials:

1 1/3 yard flannel

1 1/3 yard cotton voile

matching thread

* Wash fabrics in a mild detergent on cold, tumble dry low before sewing - I wash the flannel with the voile.

Cutting:

Fold the flannel from corner to corner to make a large triangle, cut off each edge to make a nice clean square.

Cutting.blog
Lay voile face up on a flat surface and tape edges.

Taping.blog
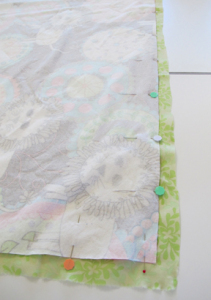
Lay flannel square face down on voile and pin around edges.

Layering.blog

Pinning.blog
Trim off excess voile.

Sewing:

Use a larger stitch on your machine, ie 3 or 3.5 rather than a 2.5. This will keep the two fabrics from pulling and puckering.

*I made a blanket with the voile on top and one with the flannel on top. Either way it is slippery so take your time and gently pull the fabrics from the back side of the machine as you are sewing.

Using a 1/2" seam allowance, stitch around entire blanket leaving an opening on one side that is 4" - 6" wide, for turning.

Clip corners and turn right side out, press.

Whip stitch the opening closed.

Top stitch around entire blanket at about 1/2" to 5/8" in from edge.

Wrap up and give to a new baby...

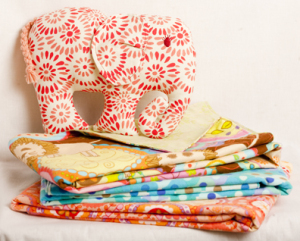
 Finishedblanket.blog

The cute elephant is Elsa one of my sewing cards...she is so easy to make and a great addition to the hand made gift for a baby.

Enjoy....

Valori

 
I hope to write again before Quilter's Affair and Quilt Show hit....next week. I want to share the amazing photos that I took while I was in L.A.


Simply Made......

Happy Friday! This is my first instalment of Simply Made. What is Simply Made? Let me tell you....I have tons of ideas and projects that are easy, and great weekend or day projects, as well as yummy food and drink recipes. I thought that I would start sharing them with all of you....

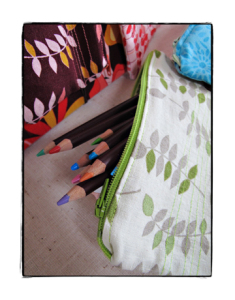
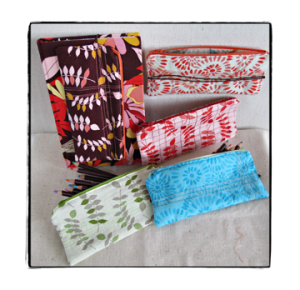
This week I will share my Pencil Case pattern. I love to carry my sketch book around but I dislike not being able to find a pencil or pen when I need it. This pattern solves all of those problems.

Ready to make a pencil case?

Pencil Case....

3 3/4" x 8" finished size
 

18pencilcases

What you will need...

Fat Quarter for outside of pencil case or scraps the size of the cutting measurement

Fat Quarter for the lining of pencil case or scraps the size of the cutting measurement

Thread for Decorative Stitching and sewing together

7" zipper

*optional - elastic to attach to the pencil case so that you can put it around your sketch book and never be with out a pen or pencil - for my sketch book I pulled the elastic around the book making it tight, subtracted the finished size of the case, 8". My elastic size came out to 8" long. I used a cord type of elastic but you can use any type of elastic.

1fabric

Cutting...

Cut 2 - 4 1/4" x 8 1/2" pieces from outside fabric

Cut 2 - 4 1/4" x 8 1/2" pieces from lining fabric

Sewing....

1. Stitch decorative lines on the ouside pieces of the case if desired.

2stitching

2. Press the top edges on all four pieces of fabric down 1/4".

3pressededges
3. Place the zipper right side up on the foleded edge of one of the lineing pieces.

4zipper1
4. Place one of the outside pieces folded edge on top of the zipper. Pin through all three layers. Making sure the fabric pieces are lined up and at the edge of the zipper.
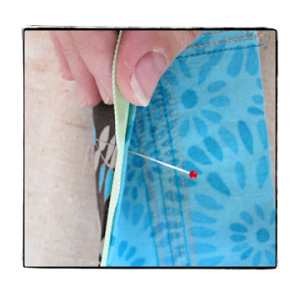
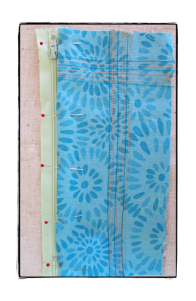
6pinning
7pinning2
5. Using a zipper foot, stitch along the edge of the fold. Do not sew over pins.
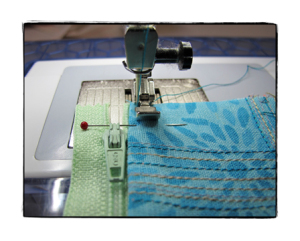
8sewzip
6. Repeat the pinning and sewing process for the other side of the pencil case.
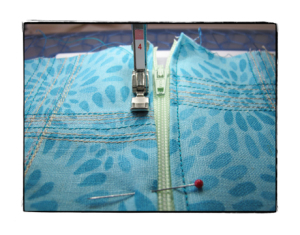
9sewzip2
7. Unzip the zipper and place the outside fabric right sides together and the lining pieces right sides together.

10assembly

8. Pin around the edges of the pencil case, make sure you fold the edges of the zipper area to the lining side.
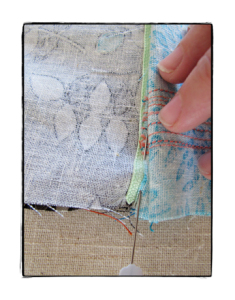
11assembly2
*If you are adding the elastic - pin one end of the elastic piece to the edge of the outside piece of fabric - lining up the end with the raw edges, lay it over the fabric making sure not to twist and pin to the other side. When you sew around the case the elastic will be secured in the seam.

9. Leaving a 2" opening at the bottom of the lining pieces stitch around entire piece.
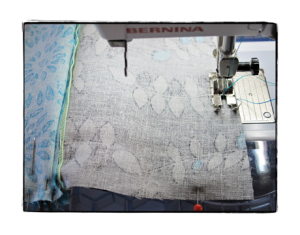
12sewing

10. Carefully clip the corners.

11. Pull the case right side out through the opening at the bottom of the lining.

12. Push the corners out with a chop stick and press entire piece.

13. Top stitch along the bottom edge of the lining to close hole.
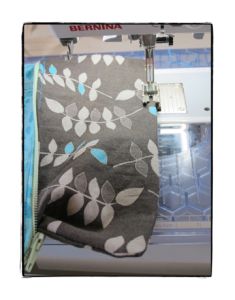
13sewingbottom
14. Push the lining into the outside piece.

15. TaDa your done!!!!!
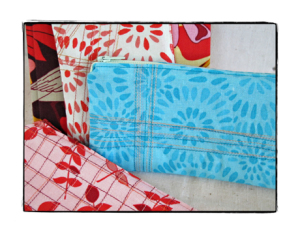
14pencilcase2
17pencilcase
18pencilcases
If you need a cool journal....Rag and Bone Bindery makes amazing journals, even using Del Hi Yellow Pom Pom Dahlia...which they call Zinnia. I sent them some of my fabric and they made journals just for us at Twigs (that is our gift shop next to the Stitchin' Post)......

Bloom-journal

Bloom... one of the great things about these journals is that they are hand made and the paper is AMAZING.....

Ingrid-journal

Ingrid....

Jenaveve-journal

Jenaveve....this is the one I have, looks a little different because they are hand made.

Wren-journal

Wrenly...

I hope you enjoyed the first Simply Made....Have a Great Weekend!!!!

XXOO
Valori


Nest has arrived......

Wow, it has been crazy busy since market....I thought that I would slow down a bit after market but it seems like there is have more to do. The only good thing about having so much work is that it has been raining all week.  The garden is going to be green, not that there is much planted right now - potentially we will have frost again......summer.....aaahhhh I can't wait for you to arrive.

The good news NEST has arrived in the shop....yeah!! We are still waiting for the cotton voile and corduroy but I expect them soon. Carolyn did an awesome display of the fabric and quilts.....if I can just remember to bring in my camera I can get a photo of it. For now here are the free patterns for three of the quilts. The shop is going to be doing kits of the free patterns, I will let you know when they are available.....

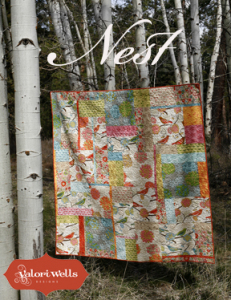
NEST.....

Nestfreepattern2

Download NestPromo2010web-New 

Nest uses a lot of the fabric in the collection in a very simple quilt, the great thing about this it is that the fabric makes it look interesting and more complex than it is.

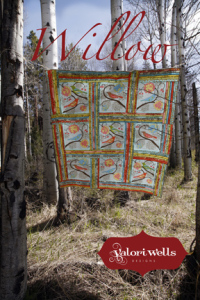
WILLOW....

Willowsm 

Download NestPromo-Willow-web

Willow uses the panel of birds and strips of a variety of fabrics all sewn together to make a non-traditional sashing. 

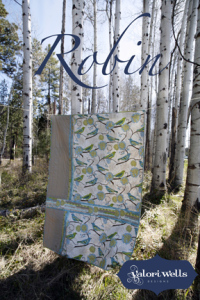
ROBIN....

Robinsm 

Download NestPromo-Robin-web

Robin take one large design and some solid to create a very contemporary quilt. Again it is simple but a very satisfying quilt to make. I really love being able to make a quilt in a day that is pretty cool. 

Ok, that is it for now kiddos.....I have to get some deadlines done and out of my hair. Quilt Show is fast approaching and I have to get out of this studio and into the shop.....

Have a great day!!

XOXO Valori
Things to do with fleece.......

With my new Della Fleece out there are questions on what to do with the fleece. You can put it on backs of quilts for a soft finish.....I personally love to just HEM IT!!! For Christmas this year I made a ton of blankets for family.....I thought that I would pass on the EASY technique or hemming your fleece.

First find some of your favorite fleece at your Local Quilt Shop.....determine the finished size of a blanket and then add 2" to each measurement. For example you want a finished size of 60" x 72" cut the fleece 62" x 74". 

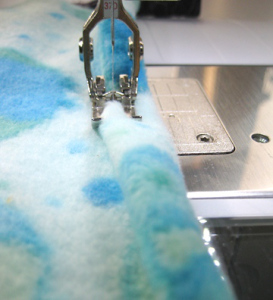
Sit down at your machine with a new needle and matching thread. Fold the edge of the fleece 1/2" then 1/2" again and start sewing.

6a00e008d551a888340120a7d03bd9970b-800wi
Take your time folding and sewing. When you get to the end sew off the edge, cut your threads, fold the next edge 1/2" and 1/2" again. This will be thick. insert the needle at the edge and slowly stitch through the layers. Continue for all edges and you have a new blanket.......I wrap mine with a funky ribbon for a gift of cozy warmth.

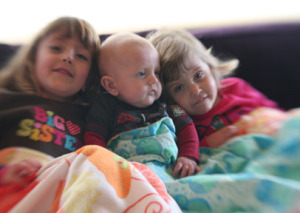
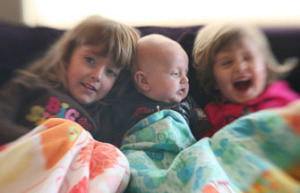
I grabbed the camera today and got a couple of shots of the kids with their blankets.....

Kids.blog 

Kids.blog2
LivT.blog
Roudyvi.blog
They love their blankies.... I did have to bribe Vi with jelly bellies to take the photos. She is SO two and just full of "NO" sass......

Have some fun with the fleece and a quick and easy gift.....

XOXO

Valori
New Projects and more......

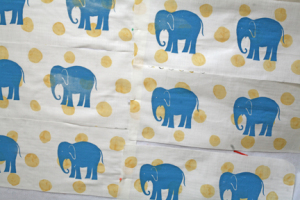
Now that my fabric is off to the "scanner people" I decided I needed a couple of hours for myself.....so, yesterday I spent some time working on the bummer pads and new quilts for the little Man! I haven't had my silkscreening equipment out in ages.....it is now out and being used. Here is what I got started. It was so fun to get to work in the ink and and do something different.........
Bumperpads
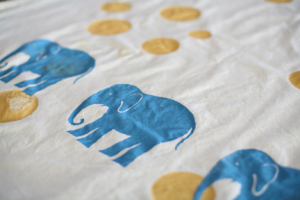
I used a double gauze fabric from Japanese designer that had the great yellow dots - then I screened the elephant onto the top. The elephant came from a photo that I took at the zoo when we were there in July. He turned out cute.
Elephant

Elephantquilt
Then with all of the excitement I screen printed yellow dots onto a solid fabric and put some elephants on the bottom and top and will make it into a quilt......now all I want to do is screenprinting and not work. I have another design ready to go with the elephants for a different quilt. Hope he likes elephants.

I also wanted to share with you a pattern that mom did for a really cool footstool. Here are the photos, instructions and illos.....now you can go out and make a great footstool.
These are the notes from mom........

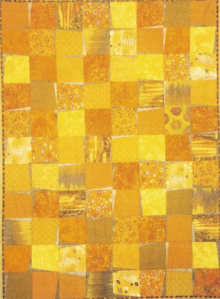
"When we were at spring market the Mosaic quilt pattern from Aardvark Quilts was my very favorite so when I decided to do a quilted footstool cover I went to this design.  Pam Goecke is a fabulous designer and we love her patterns.
Mosaic_aardvarkpatt2
This is the original quilt.
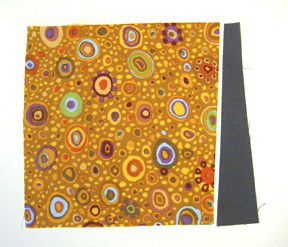
The first thing I did was measure the soft footstool (kind of like bean bag filling) that I had purchased from the West Elm catalogue. It was 24" square and 13" high. I decided on a 6" repeat block for the top and then the 6" for the sides but added panels of fabric to make it 13". It was necessary for me to make the block a little larger but the technique still worked. You slice off the end of the square at an angle and stitch another piece to it. It creates wonderful movement throughout the design.
8-25-09pic2
This is the block.
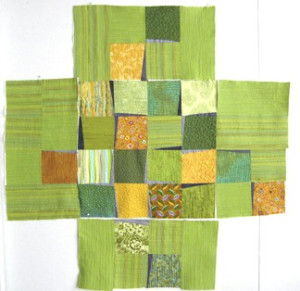
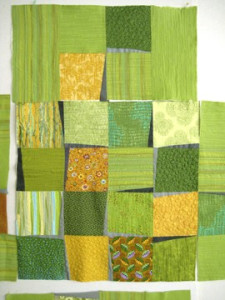
The living room in my new house is soft grey tones with green and orange accents so I started digging in my fabrics and made some blocks. I really liked the movement in the striped and the multi colored leaf fabrics. They added some spice to the design. Here you can see the blocks arranged for the top and the sides pinned next to the edges.
8-25-09pic3
Once I was satisfied with the block arrangement I stitched them together. For the sides you can see I used panels of fabric in places to fill in. I thought it would be way too busy to have all blocks on the sides.
8-25-09pic5
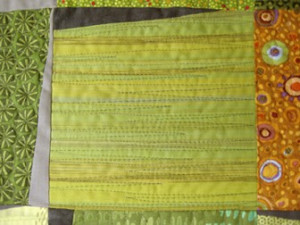
I felt it would be sturdier, with grandkids lounging and playing on it, if I quilted it. I used a thin batting and no backing. With my free motion embroidery foot I stitched grain lines like you might see on trees. I did add grey piping around the top edge.
8-25-09pic4
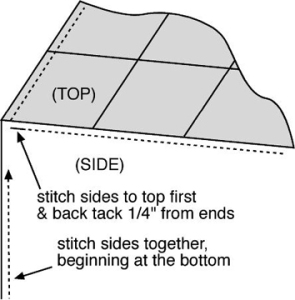
To finish it I stitched each side to the top edge starting and stopping 1/4" from the corner and back tacking. The side seams were easier than I thought. I began at the bottom and stitched the seams together ending where the sides meet the top and back tacked.
Footstool-Illo1
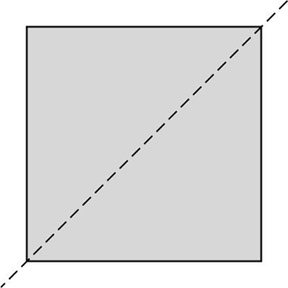
For the back I cut a square 26".  Then cut it into two pieces diagonally from corner to corner.
Footstool-Illo2
 Place the two triangles right sides together and stitch in 1" on each end using a 1/2" seam allowance and back tack. Press the seam open including the unstitched seam allowances across the triangle. Place a zipper under the seam allowances and stitch the zipper tape to the folded fabric.
Footstool-Illo3
Open the zipper at least six inches.
Place the right side of the back fabric to the bottom edges of the sides and pin all around. Stitch the back to the sides. Put your hand through the zipper opening and unzip the zipper. Turn the cushion to the right side. Fill with the filling from the purchased cushion. Zip it back up.
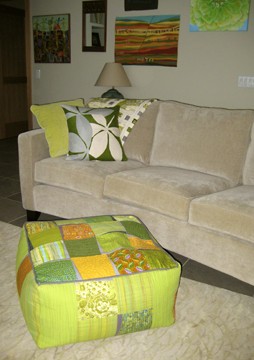
This turned out to be a lot easier than I thought it would be. The quilting was time consuming but it looks good. You can see the footstool in my new living room.
8-25-09pic6
Send me pictures when you tackle a project like this.
Jean"

I have one of these cushions and I am going to cover it with one of my new Del Hi home dec pieces.
6a00d8341e492b53ef0120a4fae429970b-800wi

HDVW18Eggplant
The Tapestry in the teal/eggplant/sage and tan background.......When I get time!!!
I am probably not going to piece my cover but I still like the idea of recovering the cushion. These cushions are great for the living room. The girls love to play on them and I think it is Sophie's favorite napping spot.
Have a great day!!!
XOXO
Valori